
Welcome to winter in Chicago! For the We Sow We Grow Project, I’m determined to show growers all over the country how they can best start their seeds, and this post is dedicated to those of us who live in snowy areas and want to use it to our benefit. Welcome to our post on winter seed sowing.
Winter seed sowing uses recycled containers that act as miniature greenhouses to sow seeds of plants that would normally survive winter either as perennials or as reseeding annuals.
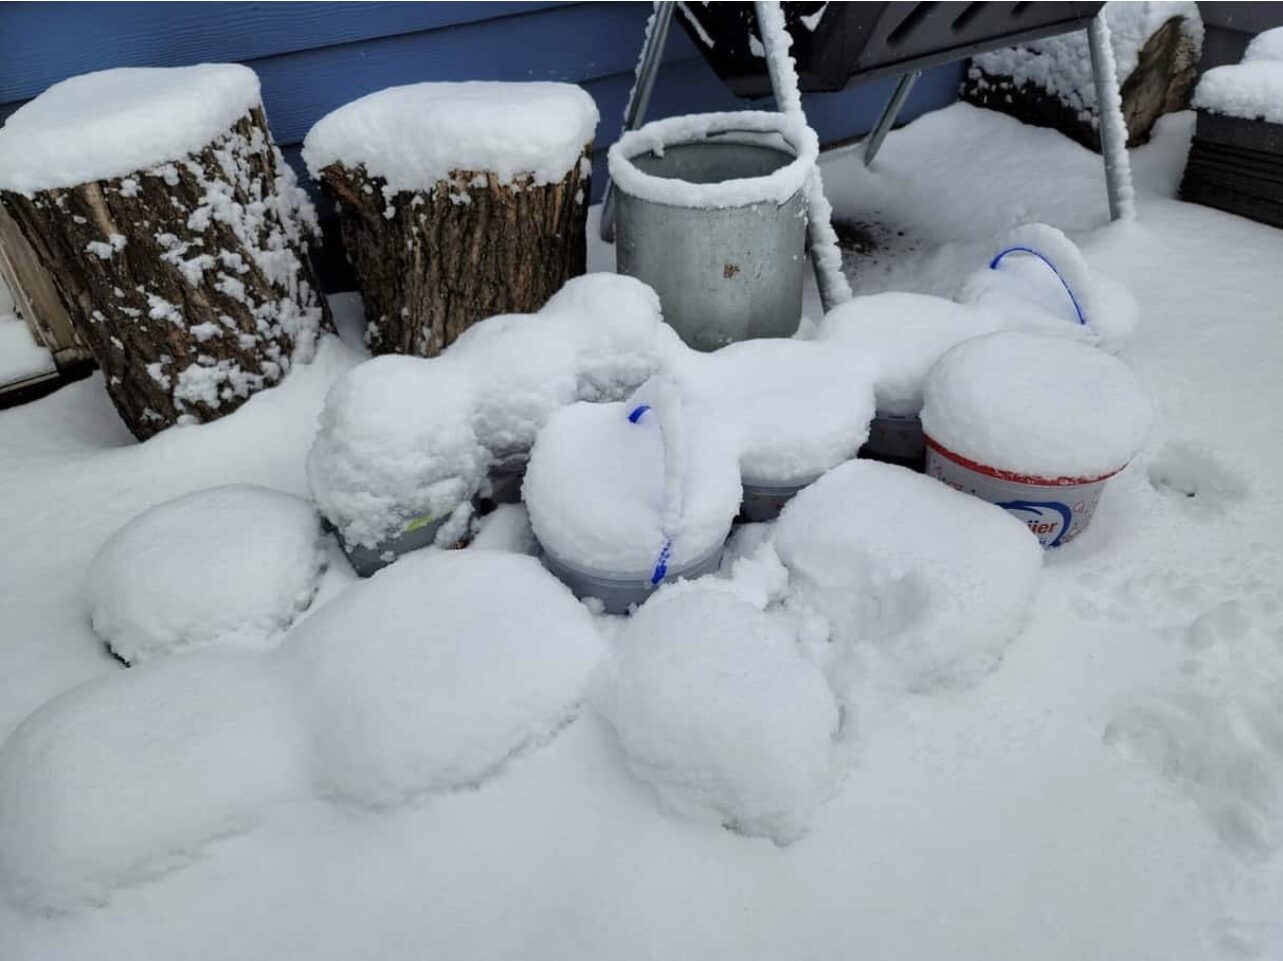
The containers protect the seeds so more survive to germinate in the spring. They receive the same weather and temperature as those directly sown in the ground. The uncapped spouts allow rain and melting snow to keep the soil moist.

What is winter seed sowing?
Winter sowing is a method gardeners might choose if they want to get a head start on gardening by sowing seeds during the winter. Winter sowing is for gardeners who don’t have the space or lighting available to sow seeds indoors.
Instead, this method uses recycled containers that act as miniature greenhouses to sow seeds of plants that would typically survive winter either as perennials or as reseeding annuals. The containers protect the seeds so more survive to germinate in the spring. They receive the same weather and temperature as those directly sown in the ground. The uncapped spouts allow rain and melting snow to keep the soil moist.
Generally, only a few varieties of seeds can be successfully sown indoors this early. But one can begin winter sowing any time after the first day of winter and as long as the nights are still chilly.
To determine which seeds can be winter sown, most plant descriptions will have notations about a seed’s germination requirements or will have a few clue-in phrases such as pre-chilling, freeze, refrigerate, stratify, colonize, and self-sows. In addition, look for terms like sow outdoors in early spring or while frosts may still occur, “sow early autumn”, “hardy,” “withstands frost,” “direct sow early,” “direct sowing,” “self-sowing,” “cold-hardy,” or “sown when cool” on the seed packet. self-sowing.
Recommended containers are recycled clear or opaque containers such as plastic milk or water jugs, two-liter soda bottles, deep foil pans with domed clear lids, and quart dairy containers. Any of these can be used keeping in mind two important requirements: if a container is a tinted plastic, your hand must be visible through the plastic for sufficient light, and it must be deep enough to allow 3-4″ of potting soil plus additional headroom for the seedlings.
The reason that winter seed sowing works well is that it mimics exactly what happens in nature. Each seed coat has to go through something in order to break out.
The Benefits of Winter Seed Sowing
Easily the biggest benefit of winter seed sowing is the cost. Honestly, it’s virtually free if you think about it. The investment that you’ll need to make will be your soil, as I’m assuming you won’t spend too much on seeds or anything else because the containers are probably waiting for you already.
Not having to use any of the space in your home for heat mats, lights, or seed starting trays is a great trade-off as well. While I know that this may not be the way to start EVERY seed in your collection it will save quite a bit of energy in those early months. And whatever you save can be reinvested into quality tools, seeds, and soil.
Another benefit of winter seed sowing is the lack of ‘leggy’ plants. Legginess happens in plants when the sunlight isn’t strong enough to provide the energy that small seed starts need, so they stretch to connect with a light source. While leggy seedlings can be saved, the work that must be done can be annoying.
What Edible Varieties Are Good For Winter Seed Sowing?
There are some great edible varieties that you can use for winter sowing. These seeds can include but aren’t limited to typical cool-season crops like broccoli, cauliflower, collard greens, and cabbage. Think thick leaves and stalks. Kohlrabi and other root vegetables are great to try. Other varieties include leafy greens like lettuce, kale, swiss chard, and bok choy. Herbs like sage, oregano, dill, and mint are also great to try. Remember to put mint in a container unless you’re keen on it taking over your garden.
How To Winter Seed Sow
Prepare Your Containers
- Rinse plastic containers thoroughly
- Remove labels
- Use scissors to cut containers almost in half, leaving a small “hinge” on one side. The handle of your jug is the perfect spot to create the hinge.
- Create drainage holes in the bottom using a sharp tool
- Create ventilation holes in the top lid

Fill Containers with Soil
- Use your choice of sterile potting mix – nothing too compact
- Fill containers with 4 – 5 inches of the mix – stopping with one inch of space at the top of your cut line
- Shake containers gently to settle the potting mix

Sow Your Seeds
- Follow the individual seed packet instructions for planting depth until you get the hang of sowing seeds in winter.
- Remember that spacing will need to be adjusted as well. You won’t be thinning these starts until it’s time to pot up or transplant.
- Press seeds into the potting mix, gently
- Mist with water (be careful of blow-back) until entire surface is moist, but not soaking
Seal and Label Containers
- Close your container
- Seal edges with duct tape
- Label your containers with
- seed variety
- date of sowing
- estimated germination time

Place Containers Outside
- Choose a location that has some sunlight, lacks high winds, and gets natural precipitation (yes, including snow)
- Let nature take over!

In a couple of weeks, you should see sprouts coming through the soil. Fight the urge to disturb them. They are doing just fine, promise. At this point, you can remove any covering and allow the elements to help sturdy the stems. Remember to recover overnight, so you don’t walk out to find your newly germinated seedlings eaten by any animals.
After your seedlings have grown their SECOND set of true leaves, it’s time to prepare to transplant them! The photo below shows initial germination. You should be looking for another 4 – 6 leaves to appear before removing any seedlings.

The rabbits had a field day in our cabbage starts. Good thing we started several containers of them!

Check back to see proper transplanting guidance, later.