

Transplanting winter sown seedlings is the part of the process nobody talks enough about. If you started seeds in milk jugs back in January or February, you’ve been watching those little condensation-covered greenhouses do their quiet work for months.
We hear plenty about the sowing — the jug-cutting, the duct tape, the sharpie labels that wash off because we forgot to use a paint pen (again). But the transplant is where the whole project either pays off or falls apart.
Here’s how we do it on the farm in West Pullman, and how you can do it at home in your raised beds, containers, or wherever you grow.
How to know your winter sown seedlings are ready
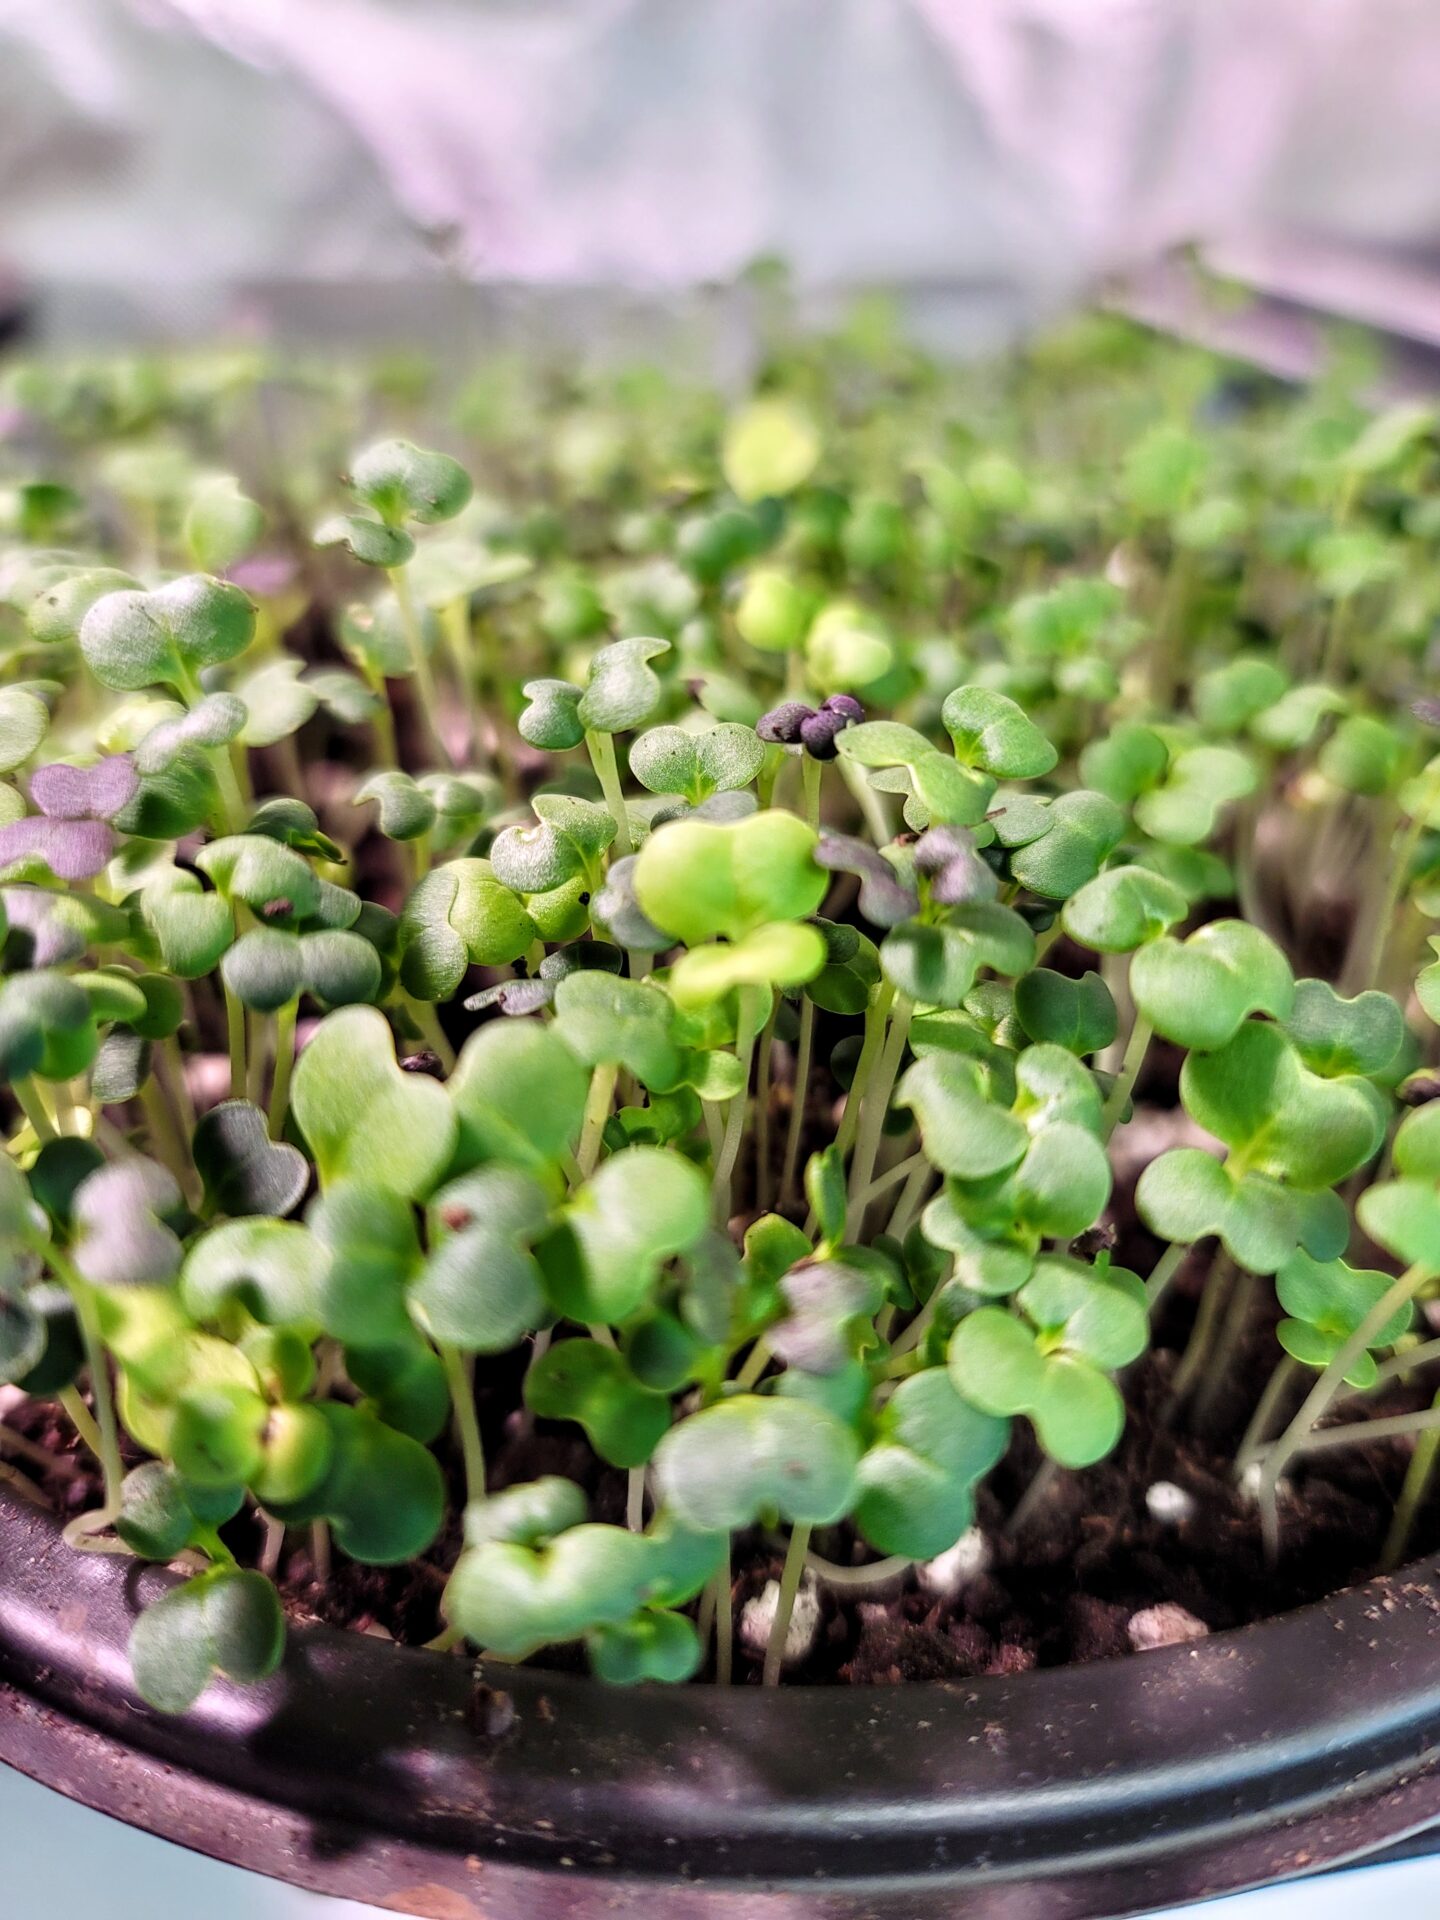
A winter sown seedling is a different animal than the leggy, pampered thing you started under a grow light in your basement. These plants have been outside the whole time. They’ve handled freeze-thaw cycles, the wild swing days where it was 60 in the afternoon and 24 overnight, and that one ice storm in March. They are tough.
That toughness means you can skip most of the hardening off ritual that indoor-started seedlings need. They’re already hard. What you’re looking for before transplanting is:
- True leaves — not the first round seed leaves (cotyledons), but the second set that actually look like the plant they’re going to be. Most seedlings need at least one good set of true leaves before they can handle a move.
- Roots that aren’t strangling each other — you don’t want to wait so long that the jug becomes a root-bound mess. If you tip the jug and the soil holds its shape entirely from roots, you’re already late. You can still transplant, it’s just going to be a little tougher to separate.
- Temperatures that suit the crop — cool-weather plants (lettuce, kale, brassicas, peas, snapdragons) can go out now. Warm-weather plants (tomatoes, peppers, basil, zinnias) wait until your nights are reliably above 50°F. In Chicago, that’s usually after Mother’s Day. Watch your forecast.
The actual transplant
Pick a cloudy day if you can. If you can’t, do it in the late afternoon or early evening so the seedlings aren’t getting blasted by sun while they’re figuring out their new situation.

Cut the tape, open the jug all the way, and lift out what’s inside. Most winter sowers end up with what we call a “hunk of sod” — a dense little block of seedlings growing together. This is normal. Don’t panic.
You have two choices, and the right one depends on the crop:
Hunk-of-sod method. For things that don’t mind being crowded — lettuce, mesclun, alyssum, anything you’d grow as a cluster — cut the block into chunks like a pan of brownies and plant the chunks. They’ll thin themselves out as they grow.
Tease-and-plant method. For things that need their own space — tomatoes, peppers, single brassicas, zinnias — gently pull individual plants apart. Hold them by a leaf, never by the stem. A stem you crush is a dead plant. A leaf you tear, the plant grows another one.
Dig your hole a little deeper than the root ball, drop the plant in, firm the soil around it, water it in well. That’s it. There’s no magic
There’s no magic
Natasha Nicholes
Water, then leave them alone
The biggest mistake I see — and I’ve made it myself — is fussing too much after transplant. Water deeply when you put them in. Water again the next morning. After that, check the soil with your finger before you reach for the hose. Overwatered transplants rot. Underwatered ones tell you they’re thirsty by drooping, and they bounce back fast once you water.
For the first week, give them a little grace. They might look sad for a day or two. Winter sown seedlings recover from transplant shock faster than indoor-started ones, but they’re still moving house. Let them settle.

A few things we’ve learned
After years of doing this on the farm, here’s what I’d tell any first-timer:
- Label twice. Once on the jug, once on a stake that goes in the ground with the transplant. You will forget which kale is which. Trust me.
- Don’t transplant in the heat of the day. I said it once already. I’m saying it again because somebody is going to do it anyway.
- Mulch around your transplants. A light layer of straw or leaf mulch keeps the soil temperature even and helps with moisture. Especially important when the May heat finally breaks loose.
- Save your strongest plants for the spots that matter. If you have ten tomato seedlings and only need four, plant the four sturdiest ones in the bed and tuck the others in containers or give them to a neighbor
Why this matters
Winter sowing isn’t just a clever trick. It’s how we put hundreds of seedlings in the ground every year on a quarter-acre farm without the cost of grow lights, heated greenhouses, or a setup we don’t have room for. It’s how families on our block grow their own food without buying a six-pack of tomatoes from the garden center every May. It works with the seasons we actually have, in the climate we actually live in.
Transplanting winter sown seedlings is one of those skills you only learn by doing it once.Get those seedlings in the ground. They’re ready. So are you.
Got winter sown seedlings ready to transplant and want to put them in real farm soil? Come find us during open volunteer hours at 11958 S. Union Ave. We’ll put you to work, and you’ll leave knowing how to do this anywhere.
FAQ:
A: When they have at least one set of true leaves and the daytime temperatures match the crop. Cool-weather plants like lettuce and kale go out in early to mid-spring. Warm-weather plants like tomatoes wait until nights are reliably above 50°F.
A: Mostly no. Winter sown seedlings have been outside their entire lives, so they’re already cold-hardened. You can skip the multi-day hardening off ritual that indoor-started seedlings need.
A: It’s a way of transplanting dense clusters of winter sown seedlings — like lettuce or alyssum — by cutting the soil block into chunks and planting the chunks intact, instead of separating each seedling
A: Not safely. Tomatoes need nights consistently above 50°F. In zone 6a Chicago, that’s usually after Mother’s Day. Watch your forecast and wait out any late cold snap.
A: Water deeply at transplant, again the next morning, then check soil moisture with your finger before watering. Overwatering rots roots faster than underwatering kills plants.